
So I finally started a project I'd been planning for a while- retrofitting true HID projectors in my Durango. I found a projector similar to the ones on eBay, that simply screws into the bulb opening on the reflector, but throws a much nicer beam. I got everything from TheRetrofitSource.com. They are the Morimoto Mini Bixenon projectors.
http://www.theretrofitsource.com/product_info.php?products_id=227
Not cheap, but a good quality kit.
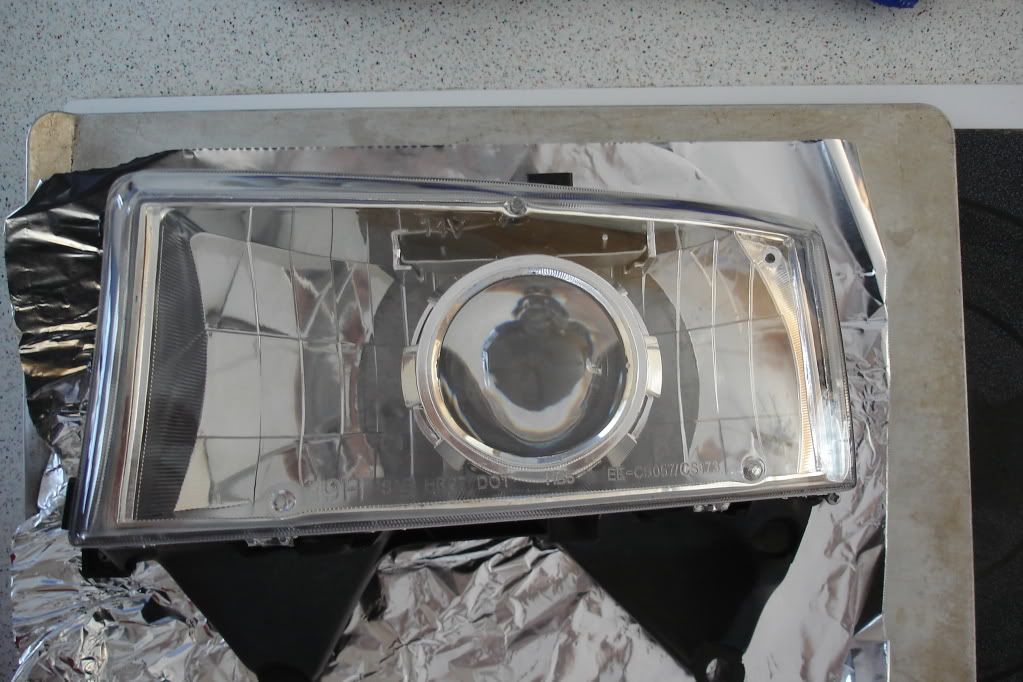
I bought clear headlights off ebay to use since the fluted lense on the factory headlights would diminish the light output significantly.
![Image]()
I opened up the headlight and did a little test fitting
![Image]()
I had to cut the top and bottom of the shrouds with a Dremel to get them to fit inside the headlight housings, which are not very tall compared to a lot of other vehicles.
Here's the whole thing sealed back up
![Image]()
A couple of output test shots (taken during the day with the truck half in the garage, lots of nice blue color in the cutoff) Note- the stock right headlight is on too in these pictures but it's very hard to tell compared to the brightness of the HID lamp.
![Image]()
![Image]()
Here's the left ballast mounted and also an enclosure which has the bixenon conversion relay (takes the 9007 connector and converts to 9005 for continuous power to the ballast and an output for the high beam solenoid) and also the relay for the Hella Micro DE fogs I put in which will have 3000k HIDs eventually.
![Image]()
Right side ballast mounted by the PCM
![Image]()
Note- these ballasts are fully sealed and on top of that the electronics are fully potted so no worries about them getting wet.
I have the driver headlight almost done. Currently waiting for silicone to cure I put around the outside once I sealed it back up to be doubly sure it won't leak. Then I have to seal up the back around the HID bulb. Then do the whole other light. I spent all day today as well as a couple hours last night and thursday working on it but this is my first project like this so I'm not surprised. I'm pretty sure I can do the whole second light in a long afternoon now that I know what I'm doing and the wiring is all done.
Also FWIW- these headlight needed a lot more time and heat than I thought to open. Most people say 200-220 degrees for about 10 minutes. I tried this and the glue gave no indication it was willing to let go. The best bet I found was 240 degrees. Bake for 15 minutes, pull 'em out and pry up as much of the lens as possible. Back in the oven for another 15 minutes, pull em out and you should be able to get the lens the rest of the way off.
http://www.theretrofitsource.com/product_info.php?products_id=227
Not cheap, but a good quality kit.
I bought clear headlights off ebay to use since the fluted lense on the factory headlights would diminish the light output significantly.

I opened up the headlight and did a little test fitting

I had to cut the top and bottom of the shrouds with a Dremel to get them to fit inside the headlight housings, which are not very tall compared to a lot of other vehicles.
Here's the whole thing sealed back up
A couple of output test shots (taken during the day with the truck half in the garage, lots of nice blue color in the cutoff) Note- the stock right headlight is on too in these pictures but it's very hard to tell compared to the brightness of the HID lamp.


Here's the left ballast mounted and also an enclosure which has the bixenon conversion relay (takes the 9007 connector and converts to 9005 for continuous power to the ballast and an output for the high beam solenoid) and also the relay for the Hella Micro DE fogs I put in which will have 3000k HIDs eventually.

Right side ballast mounted by the PCM

Note- these ballasts are fully sealed and on top of that the electronics are fully potted so no worries about them getting wet.
I have the driver headlight almost done. Currently waiting for silicone to cure I put around the outside once I sealed it back up to be doubly sure it won't leak. Then I have to seal up the back around the HID bulb. Then do the whole other light. I spent all day today as well as a couple hours last night and thursday working on it but this is my first project like this so I'm not surprised. I'm pretty sure I can do the whole second light in a long afternoon now that I know what I'm doing and the wiring is all done.
Also FWIW- these headlight needed a lot more time and heat than I thought to open. Most people say 200-220 degrees for about 10 minutes. I tried this and the glue gave no indication it was willing to let go. The best bet I found was 240 degrees. Bake for 15 minutes, pull 'em out and pry up as much of the lens as possible. Back in the oven for another 15 minutes, pull em out and you should be able to get the lens the rest of the way off.


